Recent Posts
The Importance of Roof Fireproofing: Expert Tips to Protect Your Home
12/18/2024 (Permalink)
 Explore why roof fireproofing is crucial for homeowners, along with expert insights and practical tips.
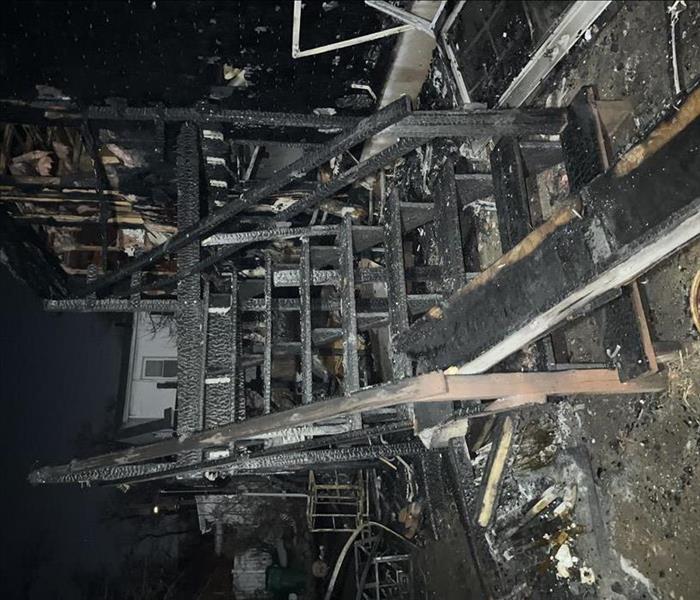
When it comes to home safety in Warwick, RI, fire prevention should always be a top priority. One often overlooked aspect of fire protection is roof fireproofing. A fire-resistant roof can make the difference between minor damage and the destruction of a home during a fire. At SERVPRO®, we understand the importance of comprehensive fire protection, and in this blog, we’ll explore why roof fireproofing is crucial for homeowners, along with expert insights and practical tips to keep your home safe from fire hazards.
Why Roof Fireproofing Matters
Your roof is the first line of defense against external elements, including fire. Whether from wildfires or accidental embers from nearby fires, unprotected roofs can ignite quickly, causing flames to spread rapidly across your home. Roof fireproofing involves using materials and techniques designed to prevent or minimize the spread of fire, giving you crucial time to respond to a fire emergency.
According to UC Davis, over 50,000 structures (mostly homes) were destroyed between 2015 and 2020. Many of these homes had roofs made of highly flammable materials like wood shingles, underscoring the importance of fire-resistant roofing solutions. You can learn more about wildfire data and fire safety tips from the Insurance Information Institute.
Key Benefits of Roof Fireproofing
Fireproofing your roof offers several benefits that not only protect your home but also provide peace of mind. Here are some of the key reasons why investing in fireproof roofing is essential:
1. Protection Against External Fire Hazards
Wildfires and neighborhood fires can send embers flying through the air, which can land on your roof and ignite flammable materials. Fire-resistant roofing materials, such as metal or treated tiles, reduce the risk of your roof catching fire from external sources.
2. Slowing the Spread of Fire
Even if a fire starts elsewhere on your property, a fireproof roof can help slow the spread of flames. This gives firefighters more time to contain the fire before it reaches critical areas of your home, potentially saving the structure from significant damage.
3. Lower Insurance Premiums
Homes with fire-resistant roofing materials are often eligible for lower homeowners' insurance premiums. Fireproof roofs are less likely to ignite, which reduces the insurance company’s risk, making your home a safer investment.
4. Long-Term Cost Savings
While fireproof roofing materials may come with a higher initial cost, they provide long-term savings by reducing the need for repairs or replacements due to fire damage. Additionally, these materials tend to be more durable and weather-resistant, reducing overall maintenance expenses.
Fire-Resistant Roofing Materials
Choosing the right roofing material is a critical step in fireproofing your home. Not all materials offer the same level of fire resistance, so it’s essential to select the best option for your location and budget. Here are some of the top fire-resistant roofing materials:
- Metal Roofing: Metal roofs are highly fire-resistant and can withstand intense heat. They are also durable and can last for decades with proper maintenance.
- Clay or Concrete Tiles: These tiles are non-combustible and provide excellent fire protection. In addition, they are aesthetically appealing and can enhance the overall appearance of your home.
- Slate: Slate is a natural stone material that is highly resistant to fire. It is also incredibly durable and can provide long-lasting protection for your home.
- Asphalt Shingles (Class A Rated): Some asphalt shingles are treated to achieve a Class A fire rating, the highest level of fire resistance available. These shingles are more affordable than other fire-resistant materials and are widely used in residential roofing.
Roof Fireproofing Maintenance Tips
Beyond selecting the right fire-resistant materials, maintaining your roof is essential to ensure ongoing fire protection. Here are some expert tips for keeping your roof fireproof:
- Regular Inspections: Schedule regular roof inspections to check for damage or wear. Cracked or missing tiles can reduce the fire resistance of your roof.
- Clear Debris: Keep your roof clear of leaves, branches, and other debris, as these materials can act as fuel for a fire.
- Gutter Maintenance: Clean your gutters regularly to prevent the buildup of dry leaves or debris that can easily catch fire.
- Proper Ventilation: Ensure your roof has adequate ventilation to prevent heat from building up inside your home, which can exacerbate fire hazards.
Conclusion
Roof fireproofing is a critical step in protecting your home from potential fire hazards. By choosing the right fire-resistant roofing materials and maintaining your roof with regular inspections and debris removal, you can significantly reduce the risk of fire damage. At SERVPRO, we are committed to helping homeowners safeguard their properties with expert fire prevention and restoration services. For more information on how we can assist you, reach out to our team of professionals today.
Investing in roof fireproofing not only protects your home but also provides peace of mind knowing that you’ve taken crucial steps to prevent fire damage. Follow these expert tips to ensure your roof is equipped to handle any fire risks, keeping your home safe for years to come.
Mold and Insurance Claims: What You Need to Know
11/13/2024 (Permalink)
 At SERVPRO®, we want to provide you with the insights you need to make informed decisions, so here's a detailed guide on mold and insurance claims.
Mold can be a costly and stressful problem for homeowners and business owners alike in Warwick, RI, especially when it comes to filing an insurance claim. Whether you’re dealing with mold caused by water damage or unexpected leaks, navigating insurance policies and knowing what to expect is crucial for ensuring you're properly covered. At SERVPRO®, we want to provide you with the insights you need to make informed decisions, so here's a detailed guide on mold and insurance claims.
Does Insurance Cover Mold?
One of the most common questions homeowners and business owners have is whether mold damage is covered by their insurance policy. The answer to this question depends largely on the type of insurance policy you have and the specific circumstances surrounding the mold growth.
In general, mold damage may be covered if it results from a "covered peril" like water damage caused by a burst pipe or an unexpected plumbing failure. However, mold that develops due to neglected maintenance issues, such as long-term leaks or high humidity, is often not covered by standard homeowner's insurance policies.
According to a report by the Insurance Information Institute, most home insurance policies include mold damage only when it’s tied to a covered event like flooding, but the exact details can vary. For example, if mold forms due to a sudden, accidental water leak, your policy might cover remediation. However, if the mold results from poor ventilation or long-term water exposure, your claim may be denied. Make sure to check your policy's fine print to understand what perils are covered.
How Mold Impacts Insurance Claims
Mold can complicate insurance claims due to the various factors involved in its growth and the need for professional remediation. To help streamline the process, it’s important to keep the following points in mind:
- Document the damage: Take photos and videos of the mold and the water source that caused it. Detailed documentation is essential for filing a successful claim.
- Get professional help: Having a certified mold remediation company like SERVPRO assess the situation is critical. Not only will we identify the source of the problem, but we’ll also provide a thorough cleanup that meets industry standards.
- Act quickly: Mold can spread within 24 to 48 hours, so swift action is crucial. The longer mold goes unaddressed, the less likely it is to be covered by insurance due to potential neglect.
- Review your policy: It’s always a good idea to review your insurance policy regularly to understand the limits of your mold coverage. If mold exclusions or limitations exist, you might want to consider adding extra coverage, such as an endorsement for mold-related issues.
Common Reasons for Denied Mold Claims
Even if mold damage is covered by your policy, claims can sometimes be denied. Understanding the common reasons for denials can help prevent future issues:
- Failure to act promptly: Insurance companies may deny claims if you fail to report the issue promptly or take too long to address the mold problem.
- Exclusions in the policy: Many standard policies contain exclusions related to mold, particularly if it's caused by long-term conditions like ongoing leaks or poor maintenance.
- Pre-existing conditions: If the mold damage existed before you purchased your policy, the insurance company may refuse to cover it.
Mold Statistics and Financial Impact
The financial toll of mold damage can be significant. According to the Insurance Information Institute, mold-related claims in the U.S. can range from $15,000 to $30,000 depending on the severity of the damage and the size of the affected area. Remediation costs can add up quickly, especially if the mold has spread extensively or requires the replacement of walls, ceilings, or flooring. You can view more details about mold claims from the Insurance Information Institute.
Final Thoughts: Protect Yourself from Mold Damage
Mold can be an unpredictable problem, but with the right knowledge and a proactive approach to your insurance policy, you can minimize its impact on your property. If you find yourself facing mold damage, don’t hesitate to contact SERVPRO. Our expert team specializes in mold remediation and restoration, helping you navigate the insurance claims process with confidence and ease.
How to Handle Electrical Issues After Water Damage
10/11/2024 (Permalink)
 We’re here to help you restore your home, business, and peace of mind!
Water damage can wreak havoc on your home, especially when it comes to electrical systems. Understanding the common electrical problems that arise after water damage and knowing how to address them can help keep your home safe.
Immediate Concerns: Safety First
When your home suffers water damage, the priority should always be safety. Water and electricity are a dangerous combination. If you suspect that water has come into contact with electrical systems, avoid touching any electrical devices or outlets. Turn off the main power supply to prevent electrical shock or fire hazards. Always contact a professional electrician to inspect and repair the damage.
Common Electrical Problems After Water Damage
- Short Circuits and Ground Faults
Water is an excellent conductor of electricity, and when it enters electrical systems, it can cause short circuits and ground faults. This can lead to electrical fires or damage to appliances and devices.
How to Fix:
- Professional Inspection: Hire a licensed electrician to inspect the wiring and electrical components.
- Replace Damaged Parts: Replace any damaged outlets, switches, or wiring.
- Install GFCI Outlets: Consider installing Ground Fault Circuit Interrupter (GFCI) outlets in areas prone to moisture to prevent future issues.
2. Corrosion of Electrical Components
Moisture can cause corrosion in electrical components, leading to malfunctioning circuits and potential safety hazards. Corroded wires and connectors can impede the flow of electricity and cause overheating.
How to Fix:
- Dry and Clean: Thoroughly dry and clean the affected areas to prevent further corrosion.
- Replace Corroded Parts: Replace any corroded wires, connectors, or components to ensure safe operation.
3. Tripped Circuit Breakers
Water leaks can cause circuit breakers to trip frequently, interrupting the electrical supply to parts of your home. This is a safety mechanism to prevent electrical overloads and fires.
How to Fix:
- Reset Breakers: First, try resetting the tripped breakers.
- Identify Water Source: Address the source of the water intrusion to prevent future trips.
- Professional Help: If the problem persists, have an electrician inspect the breaker panel and replace any damaged components.
Long-Term Solutions and Prevention
- Waterproofing Electrical Systems
Prevent future water damage by waterproofing electrical systems. Seal electrical boxes, use weatherproof covers for outdoor outlets, and ensure that all wiring is properly insulated.
- Regular Maintenance and Inspections
Schedule regular maintenance and inspections of your electrical systems. This helps identify potential issues before they become significant problems.
- Elevate Electrical Systems
In flood-prone areas, consider elevating electrical systems above potential water levels. This includes raising outlets, switches, and breaker panels to reduce the risk of water damage.
Taking Action Can Protect Your Property
Water damage can lead to serious electrical problems, but understanding these issues and knowing how to fix them can protect your home and your family. Always prioritize safety and consult with professionals to handle electrical repairs. For reliable water damage restoration in Cranston, RI, trust SERVPRO of East Greenwich/Cranston/Warwick. We’re Here to Help® you restore your home and peace of mind!
Getting Your Business Back on Track After a Winter Storm
9/20/2024 (Permalink)
 If you need help with storm damage restoration, contact our SERVPRO team today. We’re here to support you through every step of the process!
Winter storms can be tough on businesses in Warwick, RI. The aftermath can leave you feeling overwhelmed, but knowing the steps to take can make all the difference. Here’s a straightforward guide to help you recover quickly and effectively after a winter storm.
Assessing the Damage
Before you can start repairing, you need to understand the extent of the damage. Here are the steps to take immediately after the storm.
Conduct a Thorough Inspection
After the storm has passed, the first thing you should do is assess the damage. Check your property both inside and outside for any signs of damage. Look for broken windows, roof damage, water leaks, and structural issues. Make sure to take lots of photos and detailed notes of what you find. This documentation will be crucial for your insurance claim.
Prioritize Safety
Safety should always come first. Before diving into cleanup, ensure your property is safe to enter. Watch out for hazards like exposed electrical wires, gas leaks, and unstable structures. If there’s any doubt about safety, it’s best to wait for professional help to ensure no one gets hurt.
Contact Your Insurance Company
Once you have a clear understanding of the damage, it's time to get your insurance involved. Here's how to handle the process efficiently.
Report the Damage
Once you’ve documented the damage, get in touch with your insurance company as soon as possible. Provide them with the photos and notes you took during your inspection. The sooner you report, the quicker your claim can be processed, which means you can start repairs sooner.
Understand Your Coverage
It’s important to understand what your insurance policy covers. Review your policy to know what is covered and what isn’t. Talk to your insurance representative about the next steps and what additional information they need from you to process your claim efficiently.
Clean Up and Make Temporary Repairs
Before you can make permanent repairs, some immediate actions need to be taken to prevent further damage. Here's what you should do.
Start with Water Removal
If your business has experienced flooding, start by removing any standing water. Use pumps, wet vacuums, and dehumidifiers to dry out the affected areas. According to FEMA, mold can start to grow within 24-48 hours, so it’s crucial to act quickly to prevent further issues.
Remove Debris
Once the water is under control, clear out any debris caused by the storm, such as broken glass and fallen branches. Make sure to wear protective gear to avoid injury during the cleanup process.
Make Temporary Repairs
If you have broken windows or roof leaks, make temporary fixes to prevent further damage. Cover broken windows with plywood and use tarps to cover any roof damage. These temporary measures will help protect your property until permanent repairs can be made.
Hire Professional Restoration Services
Sometimes the damage is too extensive to handle on your own. Here's why you should consider professional help.
Call SERVPRO®
For serious damage, it’s best to bring in the professionals. SERVPRO of East Greenwich/Warwick/Cranston specializes in storm damage restoration and can handle everything from water removal to structural repairs. We have the right tools and expertise to get your business back to normal quickly and efficiently.
Get an Estimate
Ask for an estimate and a detailed plan of action from the professionals. This will help you understand the scope of work and the timeline for getting your business back up and running.
Restore Essential Services
Getting your basic utilities back online is critical to resuming normal business operations. Here’s what to focus on.
Check Electrical Systems
Ensure that your electrical systems are safe and functional. If there is flooding, have a licensed electrician inspect and repair any damage before turning the power back on. This will prevent any electrical hazards or further damage.
Restore Communication Lines
Make sure your phone and internet services are restored as quickly as possible. Communication is crucial for coordinating with employees, customers, and vendors. Ensuring these services are up and running will help you get back to business more smoothly.
Moving Forward with Confidence
Recovering from a winter storm can be challenging, but with the right steps, you can get your business back on track quickly. Start by assessing the damage, contacting your insurance company, and making temporary repairs. Don’t forget to update your emergency plans and invest in preventive measures to protect your business in the future. If you need help with storm damage restoration, contact SERVPRO of East Greenwich/Warwick/Cranston today. We’re here to support you through every step of the recovery process.
Mold and Indoor Plants: Tips for Keeping Greenery Mold-Free
7/15/2024 (Permalink)
Bringing the outdoors inside with indoor plants can enhance the aesthetics of your home and promote a sense of well-being. However, indoor plants can also create favorable conditions for mold growth if not properly cared for. In this blog, we'll explore some tips for keeping your indoor plants mold-free.
Understanding Mold Growth with Indoor Plants
Mold thrives in warm, humid environments with limited airflow, making indoor plants susceptible to mold growth, especially in areas with poor ventilation or excessive moisture. Organic matter such as soil, dead leaves, or decaying plant material can provide nutrients for mold growth, further exacerbating the problem. While mold growth on indoor plants may not always be immediately visible, it can spread quickly and affect plant health if left unchecked.
Tips for Keeping Indoor Plants Mold-Free
To prevent mold growth on indoor plants and maintain a healthy environment, follow these tips:
- Choose Mold-Resistant Plants: Select indoor plants known for their resistance to mold and mildew, such as snake plants, spider plants, or peace lilies. These plants are less prone to mold growth and are easier to care for in indoor environments.
- Monitor Moisture Levels: Avoid overwatering indoor plants, as excess moisture can create ideal conditions for mold growth. Allow the soil to dry out between watering and use a moisture meter to gauge soil moisture levels accurately.
- Use Well-Draining Soil: Use well-draining soil specifically formulated for indoor plants to prevent water from pooling around the roots and promoting mold growth. Consider adding perlite or vermiculite to improve soil drainage and aeration.
- Provide Adequate Air Circulation: Ensure proper airflow around indoor plants by placing them in areas with good ventilation and avoiding overcrowding. Use fans or open windows to promote air circulation and reduce humidity levels, especially in humid environments.
- Prune Regularly: Remove dead or decaying leaves, flowers, or plant debris from indoor plants regularly to prevent mold growth and maintain plant health. Pruning also encourages airflow and prevents moisture buildup around the plant.
- Clean Plant Containers: Clean and disinfect plant containers regularly to remove any mold spores or residue that may contribute to mold growth. Use a solution of water and mild detergent or a commercial plant-safe cleaner to clean pots and trays thoroughly.
- Inspect for Signs of Mold: Regularly inspect indoor plants for signs of mold growth, such as fuzzy white or green patches on leaves or soil. If mold is detected, isolate the affected plant, remove any visible mold, and adjust care practices to prevent recurrence.
- Avoid Overcrowding: Avoid overcrowding indoor plants in confined spaces, as this can limit airflow and create conditions conducive to mold growth. Space plants apart to allow for adequate ventilation and airflow around each plant.
With proper care and attention, you can enjoy the beauty of indoor plants without worrying about mold growth. By following these tips for keeping indoor plants mold-free, you can create a healthy and vibrant indoor environment that promotes plant growth and well-being. Regular monitoring, appropriate watering practices, and good airflow are essential for preventing mold growth and maintaining the health and vitality of your indoor plants.
Identifying and Addressing Hidden Water Leaks
6/19/2024 (Permalink)
Water leaks are like stealthy invaders, creeping into our homes silently and causing damage before we even notice. From dripping faucets to hidden pipe leaks, water can wreak havoc on our properties if left unchecked. At SERVPRO®, we understand the importance of identifying and addressing these hidden water leaks before they escalate into costly disasters. In this blog post, we'll delve into the realm of hidden water leaks, equip you with the knowledge to detect them, and empower you with tips to address them effectively.
Identifying Hidden Water Leaks
Detecting hidden water leaks can be challenging since they often occur in concealed spaces such as behind walls, under floors, or in the attic. However, there are some telltale signs that can alert you to their presence:
- Unexplained Water Bill Spikes: Keep an eye on your water bills for any unexpected increases, as this could indicate a hidden leak.
- Musty Odors: Mold and mildew thrive in damp environments, so if you notice musty smells, there may be hidden moisture lurking somewhere.
- Discoloration or Stains: Water leaks can cause discoloration or stains on walls, ceilings, or floors.
- Peeling Paint or Wallpaper: Excess moisture can cause paint or wallpaper to peel, indicating the presence of a leak.
- Sagging or Warped Flooring: Water pooling under flooring materials can lead to warping or sagging.
Addressing Hidden Water Leaks
Once you've identified a hidden water leak, swift action is crucial to prevent further damage. Here's what you can do:
- Shut Off the Water: Locate the main water shut-off valve and turn off the water supply to prevent additional leakage.
- Assess the Damage: Determine the extent of the damage caused by the leak. If it's extensive or if you're unsure, it's best to call in professionals like SERVPRO® for assistance.
- Dry Out Affected Areas: Use fans and dehumidifiers to dry out the affected areas and prevent mold growth.
- Repair or Replace Damaged Components: Fix or replace any damaged pipes, fittings, or fixtures contributing to the leak.
- Monitor for Recurrence: Keep an eye on the repaired area and monitor for any signs of recurrence to prevent future leaks.
Trust SERVPRO for Water Damage Restoration:
At SERVPRO, we specialize in water damage restoration and have the expertise and equipment to address hidden water leaks promptly and effectively. Our trained professionals utilize advanced techniques to detect and mitigate water damage, ensuring your property is restored to its preloss condition.
Don't let hidden water leaks go unnoticed. By staying vigilant and taking proactive measures, you can safeguard your home from the damaging effects of water intrusion. And remember, if you ever need assistance with water damage restoration, SERVPRO is just a phone call away.
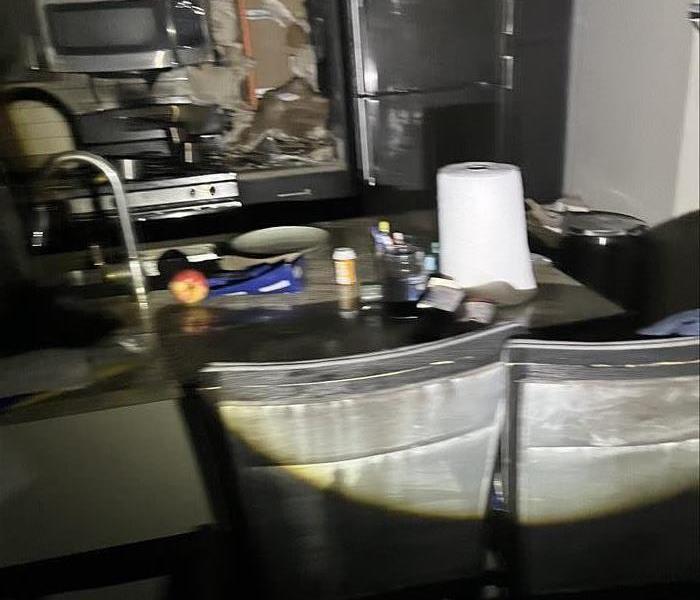
Should You Unplug Countertop Appliances to Prevent Fires?
6/4/2024 (Permalink)
 If you need assistance with fire damage restoration, contact our SERVPRO of East Greenwich/Warwick/Cranston team!
In your busy day-to-day life, it’s easy to overlook simple safety practices that can prevent home fires. One common question is whether you need to unplug countertop appliances to avoid fires. The answer is a resounding yes. Taking this precaution can significantly reduce fire risks in your kitchen. Let’s explore why unplugging these appliances is crucial and how you can enhance your home’s safety with a few practical tips.
Why Unplugging Countertop Appliances Matters
Countertop appliances, such as toasters, coffee makers, and blenders, can experience electrical malfunctions even when not in use. Over time, wires and components can wear out or become damaged, increasing the risk of sparks or overheating. Unplugging these devices when they’re not in use eliminates this risk.
Power surges can occur for various reasons, including lightning strikes and grid fluctuations. These surges can damage plugged-in appliances, potentially causing them to catch fire. By unplugging appliances, you protect them from unexpected power surges.
It’s easy to forget that an appliance is still plugged in, especially if it’s not used frequently. Accidental activation or leaving it on for extended periods can lead to overheating and fires. Unplugging appliances ensure they’re completely off and not posing a hidden risk.
Practical Tips for Unplugging and Safety
1. Develop a Routine
Make unplugging appliances a habit by incorporating it into your daily routine. For example, after making your morning coffee or toast, unplug the coffee maker and toaster. Consistency will help make this practice second nature.
2. Use Power Strips
Power strips with on/off switches can make it easier to manage multiple appliances. Instead of unplugging each device individually, you can turn off the power strip to cut off electricity to all connected appliances.
3. Check Appliances Regularly
Inspect your appliances for any signs of wear and tear, such as frayed cords or loose plugs. Replace or repair damaged components immediately to prevent potential hazards.
4. Invest in Smart Plugs
Smart plugs can be controlled remotely via smartphone apps. They allow you to turn off appliances even when you’re not at home. Some models also offer scheduling features, ensuring appliances are off when not in use.
5. Educate Family Members
Make sure everyone in your household understands the importance of unplugging appliances. Educate them on the potential risks and encourage them to develop the same safety habits.
6. Install Smoke Detectors
Ensure your kitchen is equipped with smoke detectors. Regularly test them to ensure they’re functioning correctly. Smoke detectors can provide an early warning if something goes wrong.
7. Keep Appliances Clean
Accumulated crumbs and grease can ignite and cause fires. Regularly clean your appliances to remove any buildup that could pose a risk.
Final Thoughts
Unplugging countertop appliances is a simple yet effective way to prevent kitchen fires and enhance your home's safety. Electrical malfunctions, power surges, and forgotten devices all contribute to potential fire hazards. By incorporating unplugging into your daily routine, using power strips, checking appliances regularly, and educating your household, you can significantly reduce these risks.
For more tips on fire prevention and home safety, or if you need assistance with fire damage restoration, contact our SERVPRO of East Greenwich/Warwick/Cranston team. Our team of professionals is here to help you keep your home safe and secure from fire hazards.
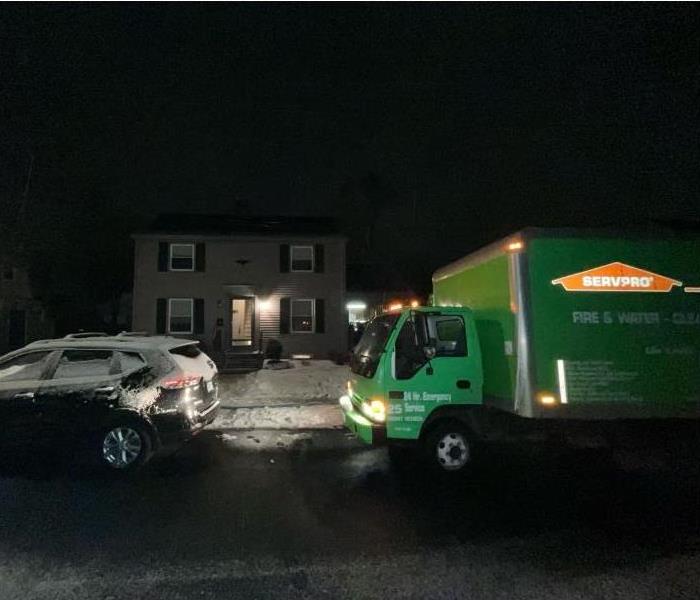
Northeast Ice Dam Prevention and Remediation: Essential Tips
5/15/2024 (Permalink)
As the winter chill sets in, homeowners in the Northeast are bracing themselves for the challenges that come with colder temperatures, one of which is the dreaded ice dam. Ice dams not only pose a threat to the structural integrity of your home but can also lead to water damage and other costly repairs if not addressed promptly. At SERVPRO®, we understand the importance of proactive measures to prevent and remediate ice dams. In this blog post, we'll share essential tips to help you safeguard your home during the winter months.
Understanding Ice Dams
Ice dams form when snow on the roof melts, and the water refreezes at the eaves. This creates a barrier that prevents proper drainage, leading to water seepage into your home. The Northeast, with its frigid winters, is particularly prone to ice dam formation.
Preventive Measures
Proper Insulation
Ensure your attic is adequately insulated to maintain a consistent temperature on your roof. This prevents uneven melting and refreezing of snow, minimizing the risk of ice dam formation.
Ventilation
Proper ventilation in the attic is crucial. It helps regulate the temperature and prevents warm air from getting trapped, which can contribute to ice dam formation. Consider installing roof vents or a ridge vent to promote airflow.
Gutter Maintenance
Keep gutters clean and free of debris. Clogged gutters can contribute to ice dam formation by preventing proper drainage. Regularly remove leaves, twigs, and other obstructions.
Heat Cables
Consider installing heat cables along the eaves and gutters. These cables generate heat to prevent ice buildup, offering an additional layer of protection during extreme cold spells.
Remediation Tips
Professional Assessment
If you notice the signs of an ice dam, such as icicles hanging from the roof or water stains on interior walls, seek professional assistance. SERVPRO experts can assess the situation and provide targeted solutions.
Safe Removal
Attempting to remove ice dams yourself can be risky. Our trained technicians use safe and effective methods, such as steam or hot water, to melt the ice without causing further damage to your roof.
Water Damage Restoration
In the unfortunate event of water damage, swift action is crucial. Our team at SERVPRO is equipped to handle water extraction, drying, and restoration to minimize the impact on your home.
By implementing these preventative measures and knowing what to do in the event of an ice dam, you can protect your home from potential damage. At SERVPRO, we're committed to helping homeowners in the Northeast navigate the challenges of winter weather. For expert assistance or more information on ice dam prevention and remediation, contact your local SERVPRO team today. Stay warm and worry-free this winter!
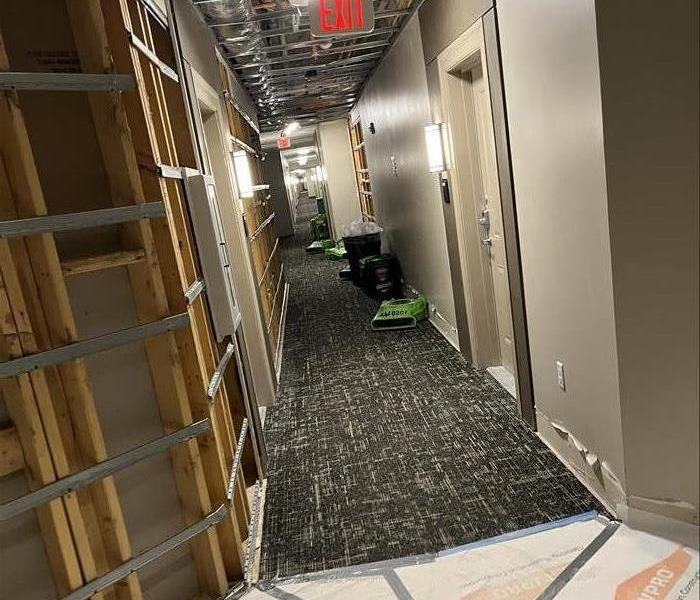
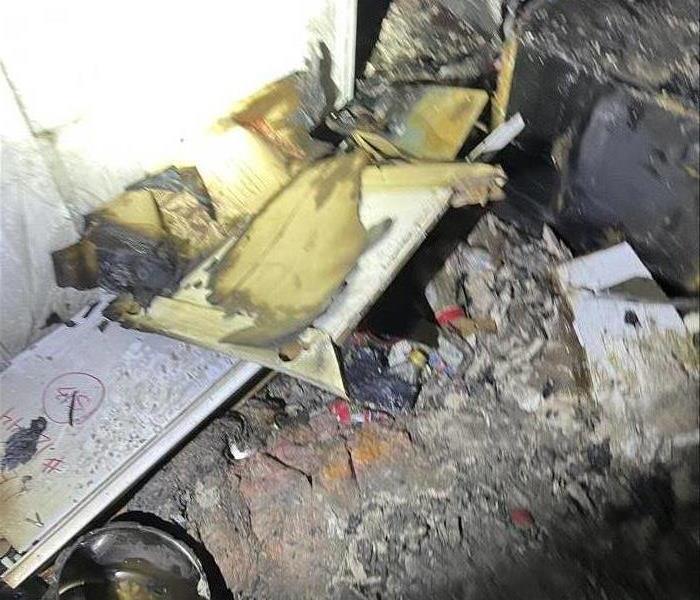
The importance of annual fire safety inspections in commercial buildings
4/19/2024 (Permalink)
 A fire damage job that SERVPRO took on.
As a responsible business owner, ensuring the safety of your commercial space is paramount. One key aspect that often gets overlooked is the importance of annual fire safety inspections. In this blog post, we'll delve into why these inspections are crucial for the well-being of your business and the people within it.
Why Annual Fire Safety Inspections Matter
Preventing Fire Incidents
Fire safety inspections serve as a proactive measure to identify potential fire hazards and address them before they escalate into serious incidents. Regular checks of electrical systems, heating equipment, and flammable materials can significantly reduce the risk of a fire breaking out.
Ensuring Compliance with Regulations
Compliance with local fire safety regulations is not just a legal requirement but also a crucial factor in safeguarding your business. Annual inspections help ensure that your commercial building meets all the necessary standards, preventing legal repercussions and potential fines.
Protecting Lives and Property
The safety of your employees, customers, and valuable assets should always be a top priority. Annual inspections help identify and rectify fire safety deficiencies, minimizing the potential for injuries and property damage in the event of a fire.
Maintaining Business Continuity
A fire can disrupt your business operations, leading to financial losses and reputational damage. Regular inspections help identify and mitigate potential risks, allowing you to maintain business continuity and recover quickly in case of an unforeseen event.
Reducing Insurance Premiums
Many insurance providers offer discounts to businesses that invest in proactive risk management, including regular fire safety inspections. By demonstrating a commitment to safety, you may be eligible for lower insurance premiums, ultimately saving your business money.
How to Conduct Effective Annual Fire Safety Inspections
Engage Professional Services
Hire qualified professionals, like SERVPRO®, to conduct thorough fire safety inspections. Trained experts can identify hidden hazards and provide comprehensive recommendations for improvements.
Inspect All Key Areas
Ensure that all critical areas of your commercial building are inspected, including electrical systems, heating and cooling equipment, emergency exits, fire suppression systems, and flammable material storage.
Develop and Implement a Maintenance Plan
Use the insights from the inspection to create a robust maintenance plan. Regularly update and implement this plan to address any issues promptly and ensure ongoing compliance with fire safety standards.
Investing in annual fire safety inspections for your commercial building is a proactive step toward protecting your business, employees, and assets. By prioritizing safety and compliance, you not only prevent potential disasters but also contribute to the overall resilience and longevity of your business. Remember, a safe business is a successful business.
Mold in Drywall: Identification and Repair
3/20/2024 (Permalink)
Mold in drywall can be a silent intruder, often going unnoticed until it becomes a more significant issue. Understanding how to identify the signs of mold in drywall and implementing effective repair solutions is essential for homeowners. In this blog post, we'll guide you through the identification of mold in drywall and provide practical tips for successful repair.
Recognizing Signs of Mold
Identifying mold in drywall requires a keen eye for subtle signs. Look for discoloration, which may appear as dark spots or patches on the surface. Mold can also manifest as a fuzzy or powdery texture. Musty odors, even if not visibly accompanied by mold, can indicate hidden growth behind the drywall. Regular inspections, especially in areas prone to moisture, can help catch mold early.
Investigating Water Sources
Mold thrives in moist environments, making water sources a crucial factor in its growth. Investigate and address any potential water leaks or sources of moisture near affected drywall areas. This may include roof leaks, plumbing issues, or even inadequate ventilation. Fixing these water sources is a fundamental step in preventing mold recurrence.
DIY Mold Testing Kits
If you suspect mold in your drywall, you can use DIY mold testing kits available in the market. These kits can help identify the presence of mold and provide insights into the severity of the issue. While these kits may offer preliminary information, it's essential to consult with professionals, like SERVPRO®, for a thorough assessment and accurate diagnosis.
Professional Mold Inspection
For a comprehensive evaluation of mold in drywall, consider hiring professionals for a mold inspection. Certified experts have the experience and tools to assess the extent of mold growth, identify hidden issues, and develop a tailored plan for remediation. Professional inspection ensures a thorough understanding of the mold situation and allows for effective repair strategies.
Effective Mold Remediation
Once mold is identified in drywall, effective remediation is crucial. Professional mold remediation services, like those offered by SERVPRO, involve thorough removal of affected drywall, cleaning of surfaces, and application of mold-resistant treatments. Professional remediation ensures that mold is eradicated, preventing its recurrence and safeguarding the integrity of your drywall.
Drywall Replacement
In cases of extensive mold damage, drywall replacement may be necessary. Professional restoration services can assess the severity of the situation and determine whether partial or complete replacement is required. High-quality materials and expert installation ensure that your new drywall is resistant to mold growth.
Preventative Measures
Preventing mold in drywall involves implementing preventative measures. Ensure proper ventilation in areas prone to moisture, such as bathrooms and kitchens. Repair any leaks promptly, and use mold-resistant drywall when installing or replacing drywall. Taking these preventative steps helps create an environment less conducive to mold growth.
Regular Maintenance
Routine maintenance is key to preventing and addressing mold issues. Keep an eye on your drywall for any signs of discoloration or unusual textures. Address water leaks immediately, and conduct regular inspections in moisture-prone areas. Proactive maintenance contributes to early detection and effective mold prevention.
Identifying and repairing mold in drywall requires a proactive approach. Regular inspections, prompt addressing of water sources, and professional remediation services are essential components of successful mold management. Trust SERVPRO for expert assistance in assessing and repairing mold in your drywall, ensuring a thorough and effective restoration process. By staying vigilant and taking proactive measures, you can protect the integrity of your drywall and maintain a mold-free home environment.


 24/7 Emergency Service